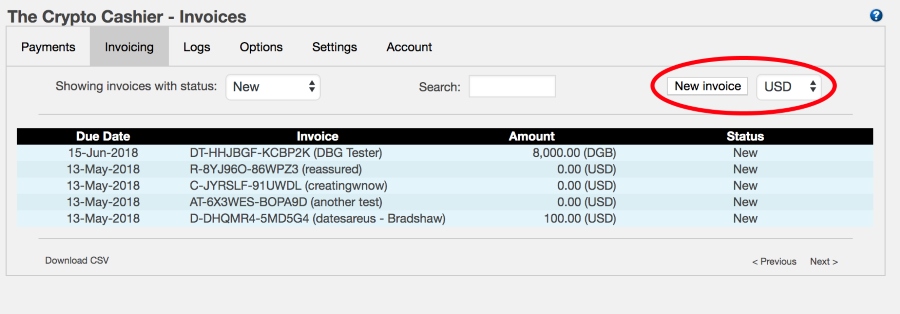
To create an invoice manually, first navigate to the Invoicing tab. Then, just underneath the tabs on the right side of the window, you should see a New invoice button. To the right of the button is a drop-down selector that allows you to select the desired base currency* for which the invoice will be priced in. For example, if you would like the invoice to be based in US dollars, then make sure the drop-down selection is “USD” before you hit the New invoice button.
*Note that the drop-down also contains your enabled crypto/token currencies, which you can use for the base currency of the invoice. See the discussion at the bottom of this section for more information.

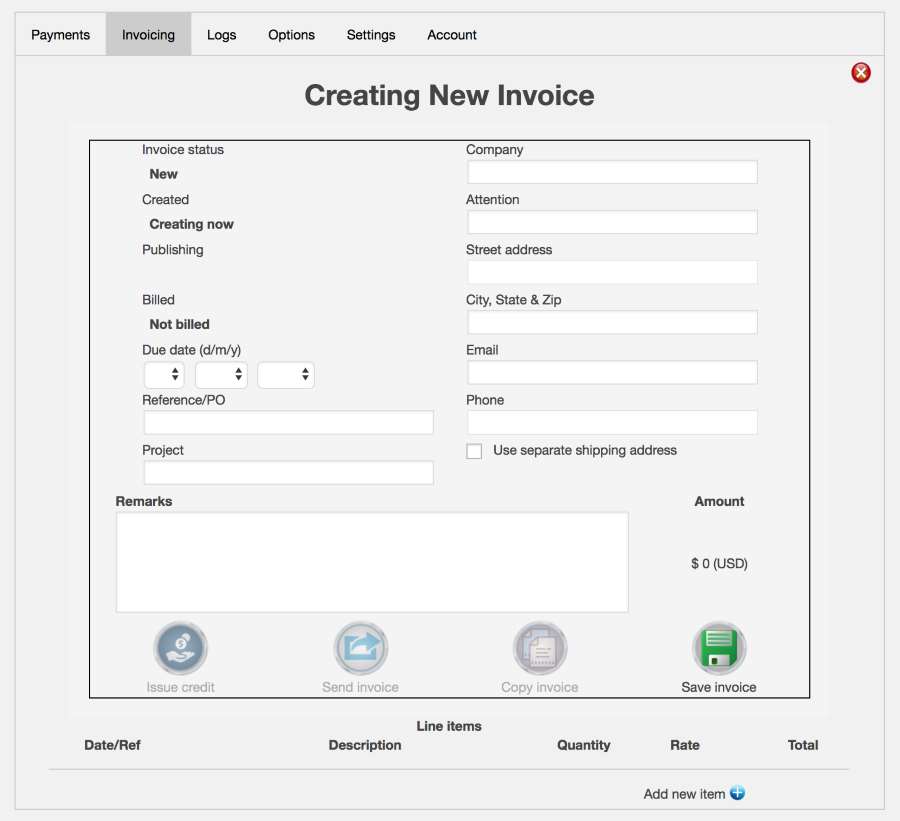
Once the New invoice button has been pressed, you will be shown an invoice template within the window, which has form fields that you can input information into.

At the top of the window, you will note that you are now creating a new invoice. The invoice should be filled out as much as possible, giving the information about the customer and the products/services which have been provided to the customer. Such as:
- Company – This is the name of the company that the bill will be sent to and expected to pay for the product or service.
- Attention – This is the contact name of an individual person at the company. It can also be a department.
- Street address – This is the postal address
- City, state and zip code – This is continuation of the postal address
- Email – The email address of the person or department that will be receiving the bill.
- Phone – The phone number of the contact at the company.
Additionally, if you have a separate shipping address, which differs from the billing address, you can check the box for separate shipping, which will reveal another set of input fields for which you can specify the shipping information.
On the left side of the window, there is some information which shows the status of the invoice, these are informational only, cannot be manually entered, but are automatically updated depending on the actions taken during the lifetime of the invoice. These fields are: status, creation date, publishing information (PDF generation), and the billing date.
Next, you should specify the Due date. The due date of the invoice is the latest date you are allowing the customer to pay the balance due.
The Reference/PO and Project fields are additional fields for you to specify information that will help the customer identify the product, order, or service in their system. When the customer receives the invoice, this information could help them match records within their own system and result in hopefully faster payment processing.
The Remarks text field allows you to specify more details regarding the product or service you are delivering to the customer.
Note: When the customer views the invoice online, only minimal information is shown. When viewing online, the customer will only be able to see the invoice id, status of the invoice (paid or outstanding), amount due, due date, and the remarks. (The invoice id is automatically generated after you save the invoice.)
 |
You can save the invoice at any time using the green Save invoice button. |
Now that the general information has been entered into the invoice, the line items should be added at the bottom. The line items specify the unit costs/charges that break down the invoice amounts due. You can add line items by using the small blue + button as shown in the following illustration.

You can add as many line items as needed. For each line item, you specify:
- Date/Ref – A date or some other reference of the service or product delivered to the customer
- Description – A short description of the product or service
- Quantity – Either the number of products or the number of hours for a service
- Rate – The cost of one product or one hour of work
- Tax – Any tax applicable (as a percentage of the total of this line item)
- Discount – Any discount you’ve granted the customer (as a percentage of the total of this line item)
For example, you may have something like the following for one of your line items:

You will see the overall invoice amount due change along with the line items you add or modify.
 |
Don’t forget to save the invoice when you’ve finished adding/modifying your line items. |
*Using a Crypto/Token as the Base Currency for an Invoice
As noted above, when creating an invoice, you can create an invoice specifically based on any crypto-currency or token you’ve enabled in the Payment Options section. When you base an invoice on a crypto/token, then your customers will need to pay in that crypto/token (they will not be given any other types of payment options. For example, if you base your invoice in LTC (Litecoin), the customer you bill that invoice to will only be shown the LTC payment option. The invoice will specifically state that payments in LTC are preferred.

