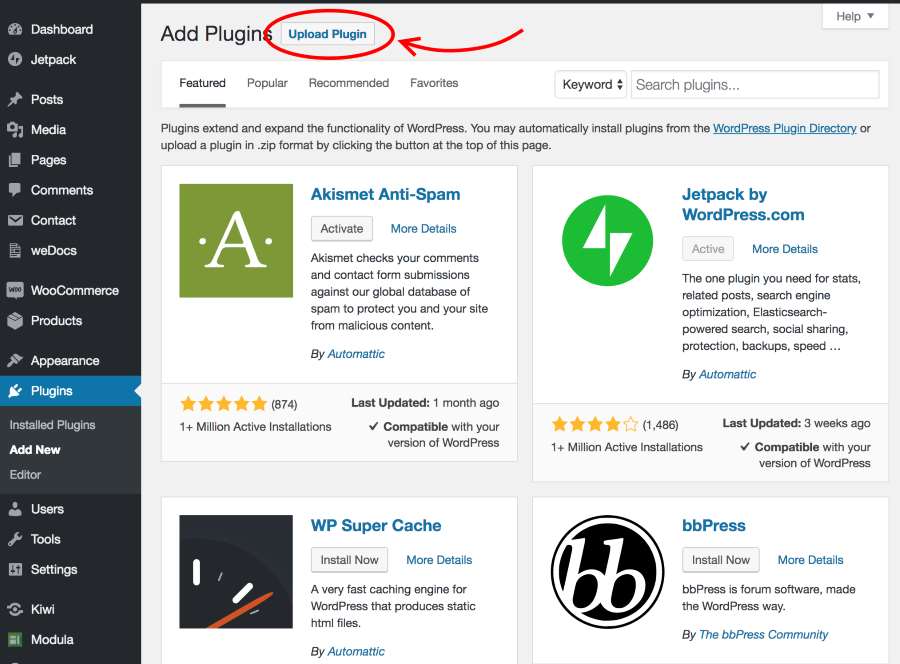
WordPress makes installation of plugins very easy. To install The Crypto Cashier plugin into your WordPress site, first go to your WordPress Plugins control tab, and hit the Add New button on the top of the screen. You will then be shown a list of available plugins that you can install. You will also be shown at the top of the screen, an Upload Plugin button.

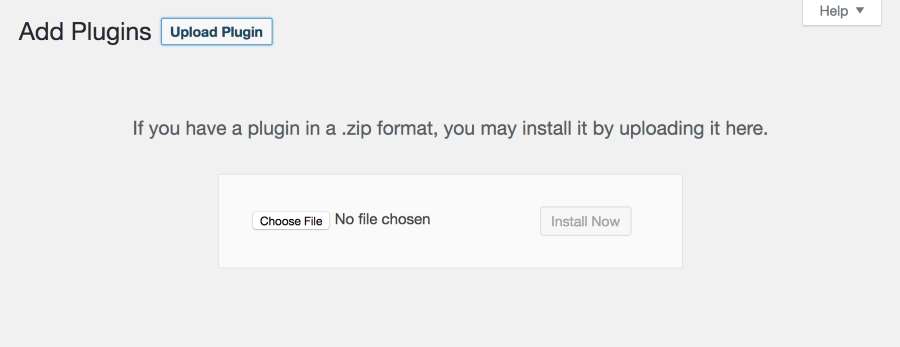
If you click on the Upload Plugin button, you’ll be presented with an upload area where you can select files for uploading to your site.

If you have the zip file containing the code for The Crypto Cashier plugin, you can click on the Choose File button, find the zip file and select it for upload. The zip file will be uploaded and the plugin will be installed. You will then need to activate the plugin, then proceed to Account tab in The Crypto Cashier administration panel to initialize your account.
Upgrading from a Previous Version
Occasionally, a new version of The Crypto Cashier plugin will become available. You can download the latest plugin package from the download links in your account page at thecryptocashier.com. Once you’ve downloaded the new package (it’s a zip file), you can begin the update procedure as described in the following paragraph.
First, go into the Plugins area of the WordPress administration panel. Find The Crypto Cashier plugin and disable it. After it’s disabled, you can safely delete it. (Don’t worry, you won’t lose any of your settings. When you re-install the plugin with the new zip file, you’ll see your system as it was before, only now running on the new version.) After deletion, simply follow the instructions above using the new zip file to install the plugin.

